Adding a new Application
Anyone can submit an application to be included to the nmaas catalog, thus making it available to all users of the production instance. Each application should have at least one official maintainer who will regularly pull changes from the upstream project and provide updated Docker images and Helm charts. The source code for each Helm chart should be hosted in a separate Git repository.
A brief guide on how a new chart repository can be set up using the GitHub platform is presented below.
Please note that we do not require the use of GitHub or mandate a specific code hosting service. Any platform that is publicly accessible would suffice.
Process Explanation
Applying for an application to be added to the nmaas catalog is a two-step process. First, the chart needs to be created, and then a brief proposal submitted to the nmaas team via email. After reviewing the chart, the user who submitted it will be assigned a new role on the production instance of nmaas (https://vnoc.nmaas.eu) – tool manager, which allows uploading of new versions and parameter changes.
Step 1: Create a new GitHub Repository
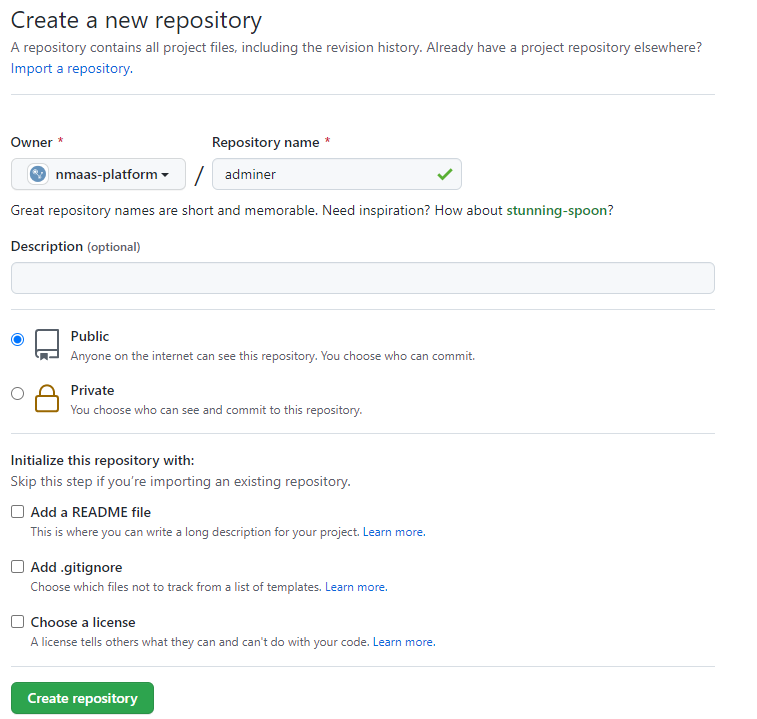
- Login or register a new account on GitHub and create a new public repository. Repositories can be created either as an individual user or as an organization.
Step 2: Configure GitHub Pages for Hosting the Helm Repository
GitHub has a free option for hosting static files for public repositories called GitHub Pages. This is a hugely popular tool for publicly hosting simple blogs or websites created using static site generators such as Hugo or Jekyll. However, in our case, this is also a perfect opportunity to host the index.yaml metadata file required for every Helm repository.
To enable GitHub Pages for your project, the following steps need to be performed:
- Clone the newly created repository locally and a dummy .gitignore file which can be used later.
Warning
Before pushing the changes to the remote and executing the git push command, make sure to correctly identify the name of the default Git branch. This varies from environment to environment, and in the case of GitHub, can be directly checked from the settings screen of the given repository (Settings → Branches).
-
Create a new branch called
gh-pages -
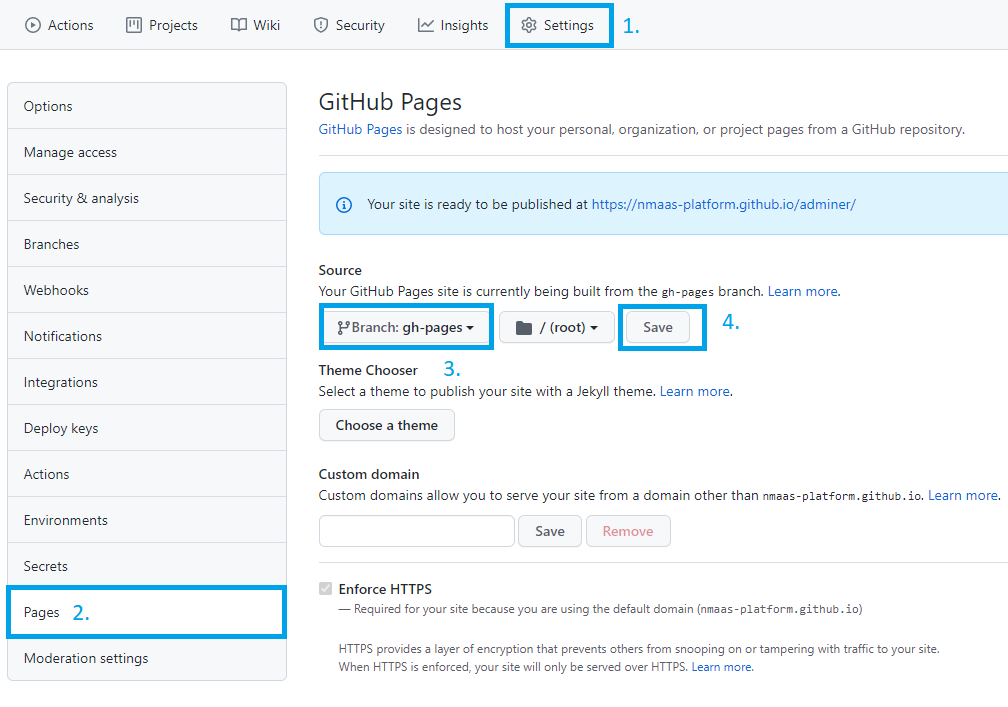
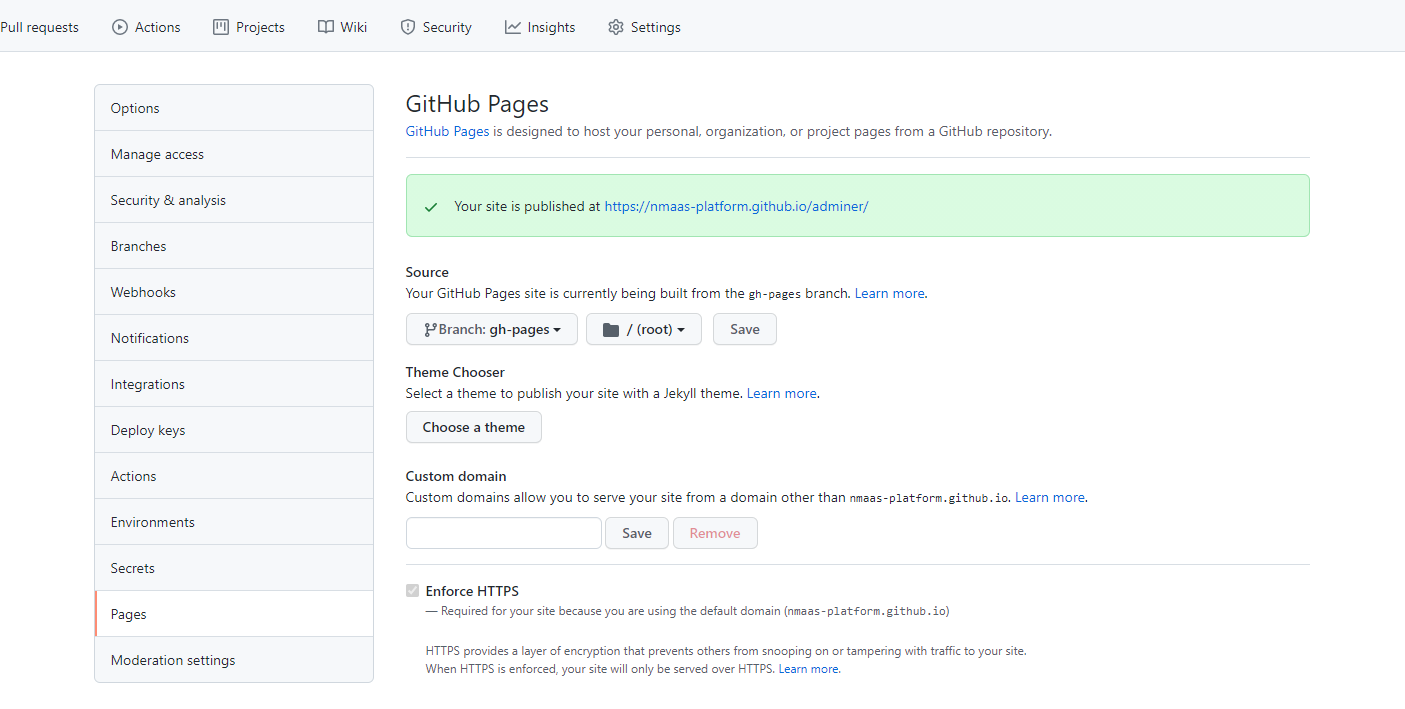
Once the branch is created, GitHub Pages can be officially enabled from the Settings page of your repository
- If desirable, you can add any
index.htmlfile to thegh-pagesbranch, so that users are not presented with a 404 error when directly accessing the Helm repository root URL. Note that this has no effect on the functionality of the Helm repository itself.
Step 3: Preparing the Chart
We are now ready to publish the source code for our chart. The GitHub Actions that we will configure in the next step mandate that our charts are placed in a charts directory within the repository.
-
Switch to the master branch of the repository
-
Create the necessary directory tree
-
Create a new chart or copy the source files of an existing chart
Step 4: Automatic Publishing of New Chart Versions
It would be tedious to manually package each new chart version, update the artifacts to GitHub, create a new release, and update the index.yaml file on the gh-pages brach which contains the Helm repository metadata. Instead, we can automate all of these tasks using GitHub actions. To do so, we will configure automatic linting of our charts as well as publishing.
-
Switch to the master branch of your repository and create a new folder,
.github/workflowswhich would contain the definition for our GitHub pipelines. -
Create a new file called
linting.yamlwith the content available below. This job will execute whenever there is a new pull request and will check whether it conforms to the best Helm charts writing practices..github/workflows/linting.yaml name: Helm Chart Linting on: pull_request: paths: - 'charts/**' jobs: lint-chart: runs-on: ubuntu-latest steps: - name: Checkout uses: actions/checkout@v2 with: fetch-depth: 0 - name: Set up Helm uses: azure/setup-helm@v1 with: version: v3.4.0 - uses: actions/setup-python@v2 with: python-version: 3.7 - name: Set up chart-testing uses: helm/[email protected] - name: Run chart-testing (list-changed) id: list-changed run: | changed=$(ct list-changed) if [[ -n "$changed" ]]; then echo "::set-output name=changed::true" fi - name: Run chart-testing (lint) run: ct lint --debug -
Once a pull request has been merged to master we want to automatically release a new version of the chart. For this purpose, we create a new workflow by defining the file
release.yaml..github/workflows/release.yaml name: Release Charts on: push: branches: - master paths: - 'charts/**' jobs: release: runs-on: ubuntu-latest steps: - name: Checkout uses: actions/checkout@v2 with: fetch-depth: 0 - name: Configure Git run: | git config user.name "$GITHUB_ACTOR" git config user.email "[email protected]" - name: Run chart-releaser uses: helm/[email protected] env: CR_TOKEN: "${{ secrets.GITHUB_TOKEN }}" -
Commit the changes to these new files
Step 5: Testing the Automations
We have prepared the source code of the Helm chart in Step 3 and set up the required GitHub actions in Step 4. We are now ready to test our automation tools.
-
Create a new branch with an arbitrary name
-
Open the
charts/my-chart/Chart.yamlfile and increment the version field of the chart -
Push the changes to GitHub
-
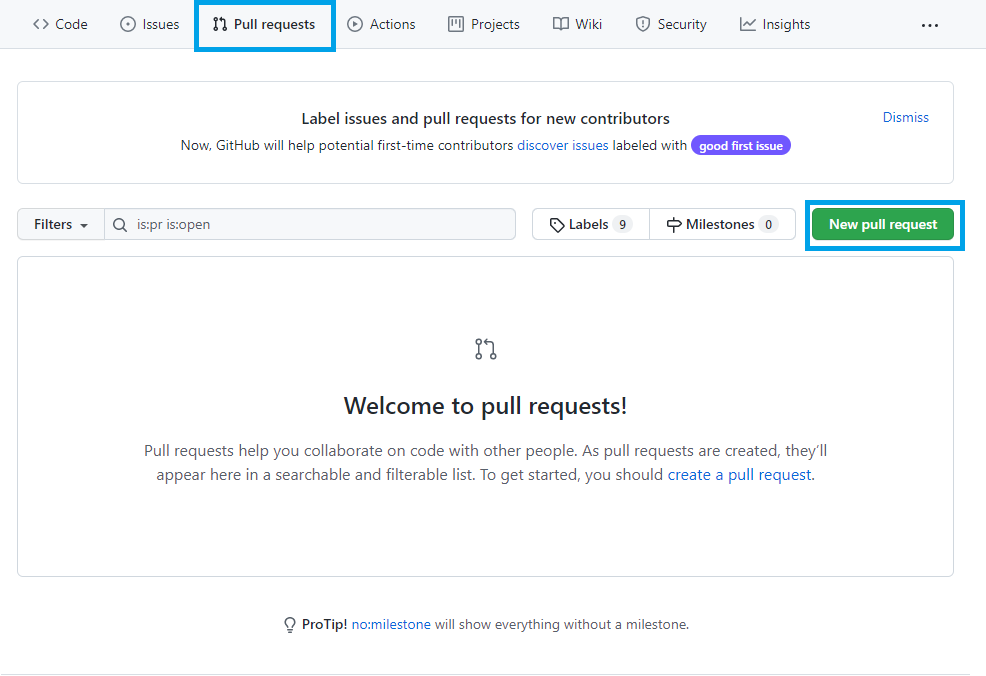
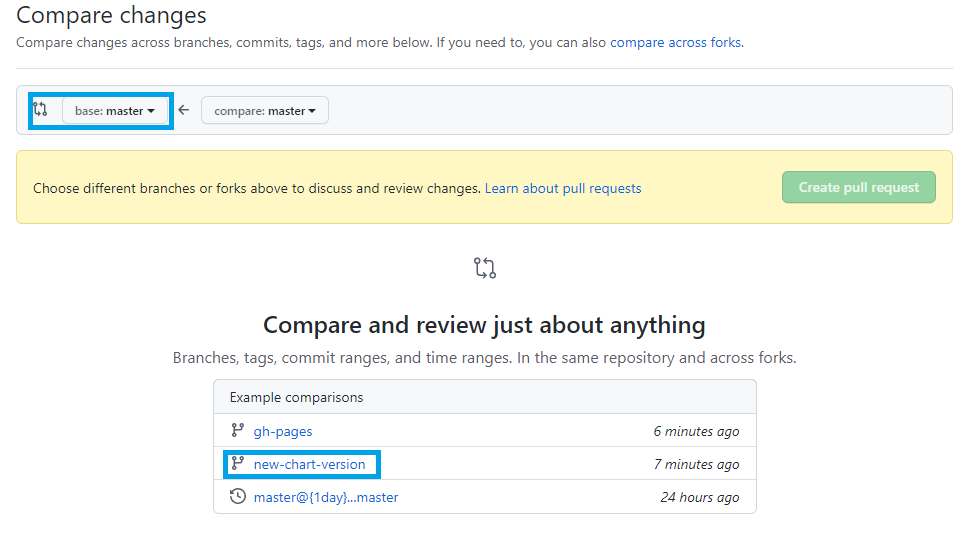
Go to your repository on GitHub and open a new pull request from the Pull requests page. As source branch choose the newly created one –
new-chart-version.
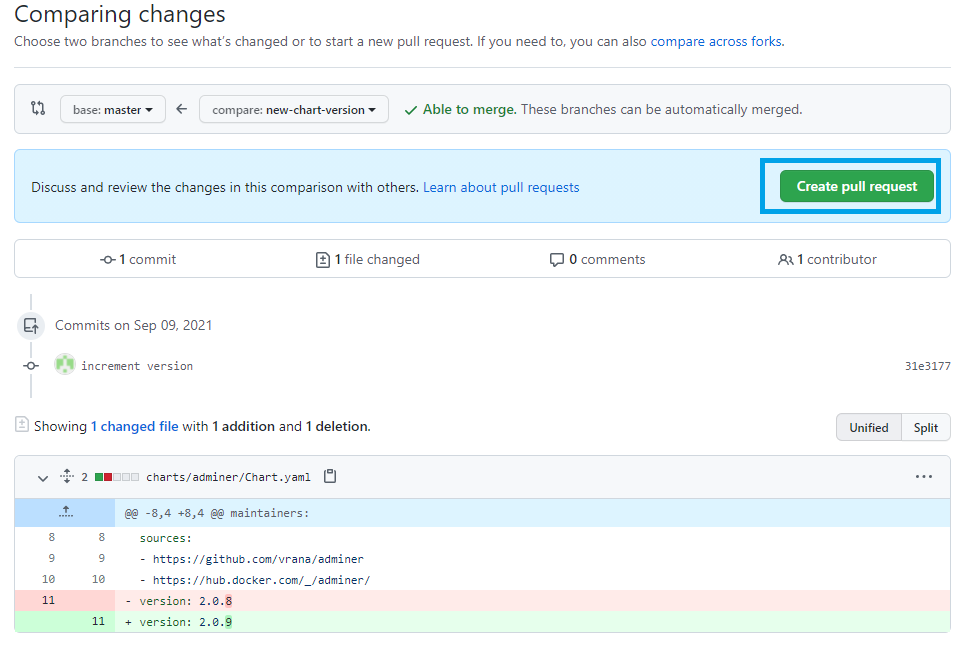
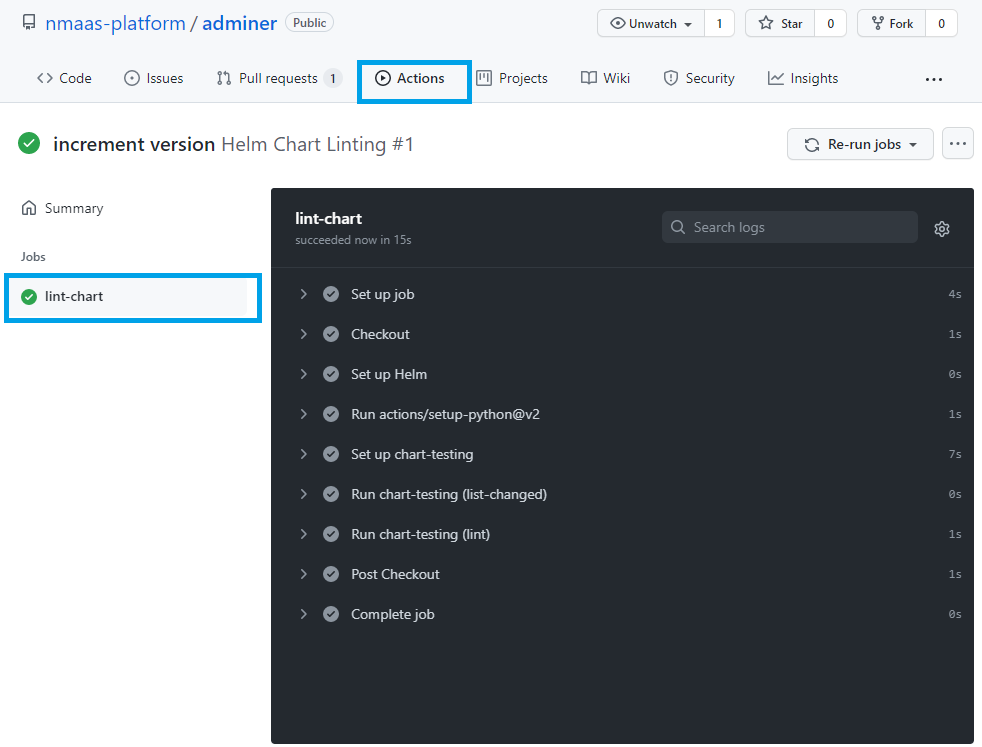
- Once the pull request is created the lint workflow should be automatically triggered. You can check the status from Actions page on your GitHub repository.
- Should everything go well, we are ready to merge the changes to master. Choose Pull requests and select the previously created one. Choose the option to automatically merge its changes.
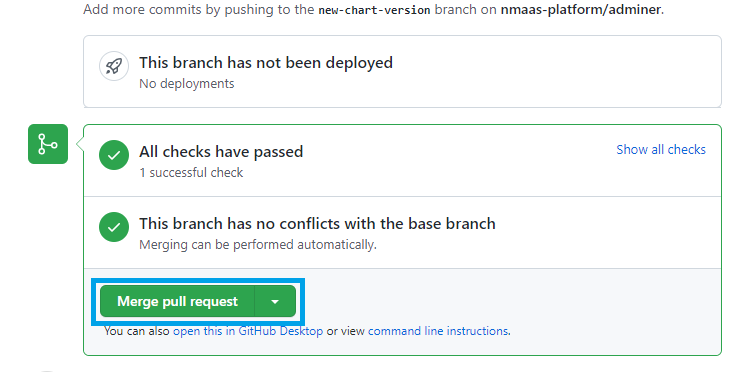
- With the merging of the pull request, the second workflow that we defined should have automatically been triggered.
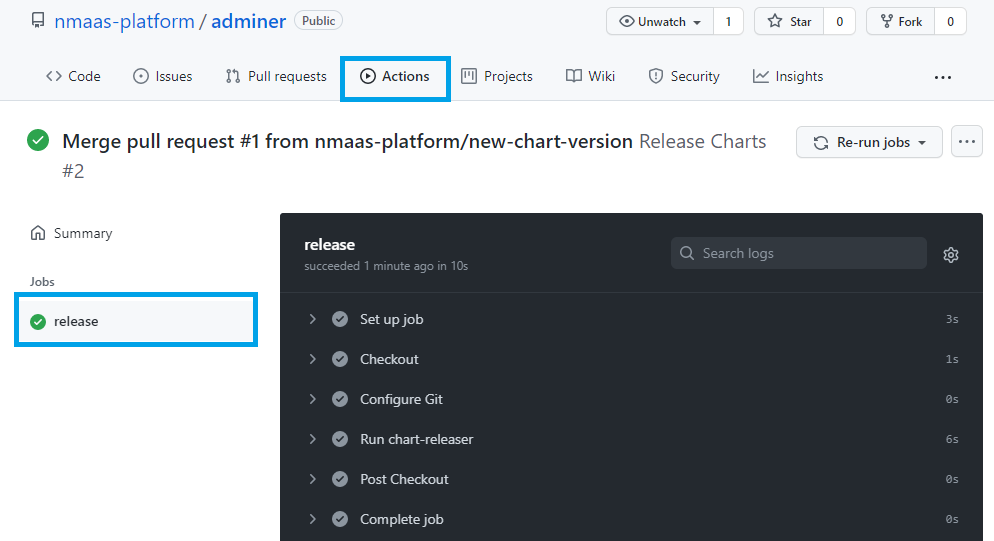
- As a result of this workflow, a new Release should have also been made in our repository.
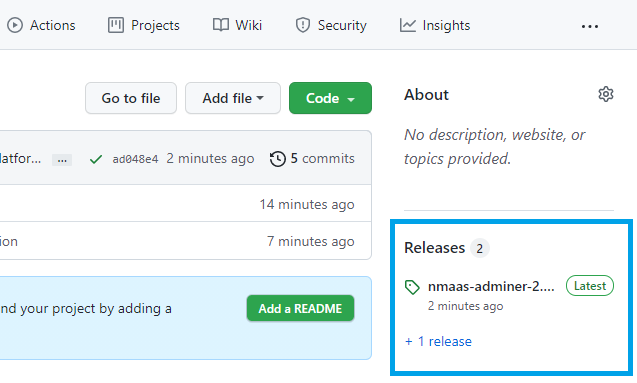

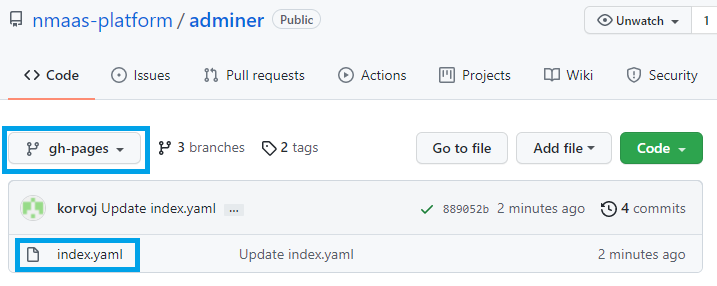
- If we switch to the
gh-pagesbranch, we can see that there is a new file that has been automatically created –index.yamlwhich contains the necessary metadata for the Helm Repository.
Step 6: Using the Helm Repository
We are now ready to use our Helm repository by simply adding it to our list with the Helm client.
You can find the generated link to your GitHub Pages website by navigating to Settings → Pages.
Step 7: Generating a README File with Default Values for the Chart
Each chart submitted for addition to the nmaas catalog must have a README file containing all of the parameters that can be altered during its deployment. Such a README file can either be created manually or automatically. Helm-docs is one such tool for automated generation of chart descriptions.
-
Download the latest release of helm-docs from the official Releases page: https://github.com/norwoodj/helm-docs/releases
-
Install it locally:
-
Set the root of your Git repository as the working directory and execute the following command:
-
We need to specify the
--output-fileparameter so that theREADME.mdfile will be created in the root of our repository instead of directly where the chart is located (charts/my_chart). -
If the output is satisfactory, execute the same command, but now without the
--dry-runparameter and push the changes either to a new branch or directly tomaster.
Conclusion
We have created an automated pipeline using GitHub Actions which would automatically check all new changes to our chart and if accepted will release a new version of it, ready to be installed in an existing Kubernetes cluster.
The workflow for releasing a new version of a chart is:
- creating a new branch and make the necessary changes, incrementing the version field in the
Chart.yamlfile. - creating a new pull request to merge these changes to
master. At this point the linting task will be executed. - merge the changes to the
masterbranch. At this point the release task will be executed.
If you want to see your chart added to the nmaas catalog please contact [email protected] with the following information:
- URL to the upstream source-code repository of the proposed application
- Brief description of its features
- URL to the Docker image backing the chart
- URL to the Helm repository
- A list of maintainers of the Helm repository