Application Manager Guide
Warning
This guide is currently a work in progress. Some sections might be missing or contain incomplete information.
Introduction
The information about applications supported by a given nmaas instance is managed from the nmaas Portal of the given installatio.
A dedicated wizard composed of several forms was developed to ease this management operation and guide the user (with appropriate role assigned) through the process of adding new or updating existing application information.
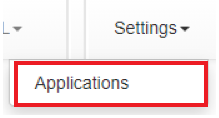
In order to access the applications management area user should open the Settings drop down menu available on the top navigation bar and click the Applications button.
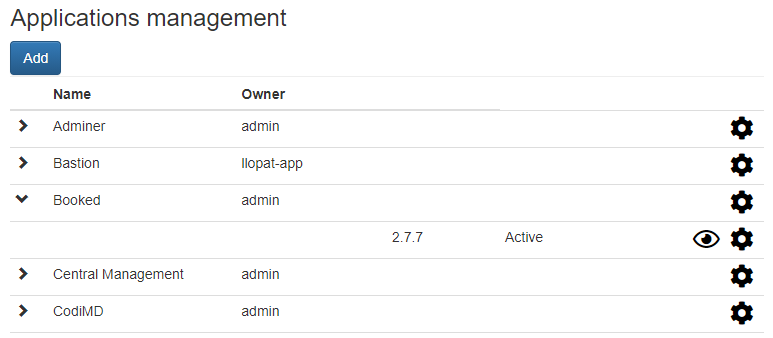
The main view lists all the applications available in this particular nmaas installation or a filtered list of applications to which a given user has management access. For each application its Name and Owner user is provided. When an application entry is clicked subsequent information about available versions of particular application and their status is displayed.
The application version statuses are the following:
New- status assigned automatically after new version is submitted (application not yet visible for Portal users)Active- version displayed in the Portal and available for subscription and deploymentDisabled- version displayed in the Portal but not available for deploymentDeleted- version hidden in the Portal (including the Administrator panel)
Info
Only applications with at least one Active or Disabled version are visible in the Portal
Transitions between application version statuses can be performed only by the System administrator
When a version is marked as Disabled its deployed instances are not affected, but no new deployments can be triggered
From this view an Application manager can perform the following actions:
- initiate the process of adding new application to the portfolio by clicking on the
Addbutton located above the list of applications - edit general information about an application by selecting
Editoption from the application context menu (gearwheel icon next to the application name) - add new version of given application by selecting
Add new versionoption from the application context menu - edit information about particular application version by selecting the Edit option from the application version context menu (gearwheel icon next to the application version identifier)
Info
The applications from the nmaas portfolio are being deployed on Kubernetes. To this end each application has to be containerized and described in the form of a Helm chart.
Info
The application administration option is available only for users with System administrator or Application manager roles assigned.
The Application manager has the possibility to add new applications to the portfolio as well as to manage applications user owns (meaning applications added by the user or for which the System administrator assigned the user as an owner.
Adding a New Application
Once granted the Application manager role, the user is able to submit new applications to the system.
A complete application definition in the system comprises on one side a general set of information about the application (e.g. its name and logo) and on the other side data specific to particular version of the application (e.g. its deployment details). It is assumed that the general part is common for all the versions of the applications however the specific details may vary for different versions.
The required data will need to be provided on a number of forms.
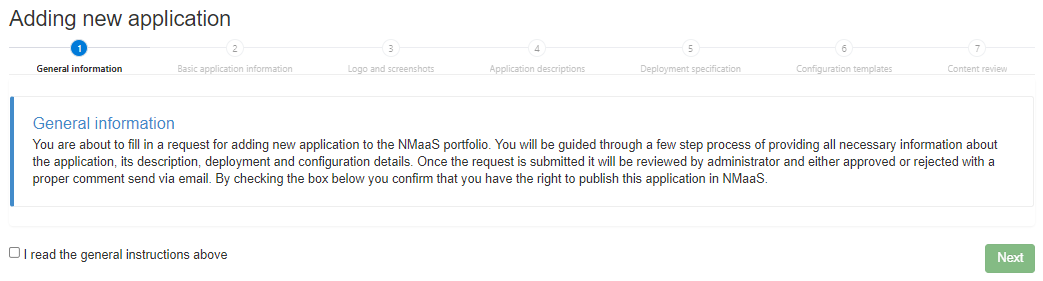
First, the user is requested to confirm that they have the right to publish particular application on nmaas (for example by verifying its license conditions).
In order to proceed the user should check the checkbox and click on the Next button.
Warning
If the users leaves the new application wizard before submitting the information on the last form all the entered data will be lost.
Info
A newly pushed application needs to be reviewed and approved by the System administrator. Only then is becomes Active and available in the portfolio.
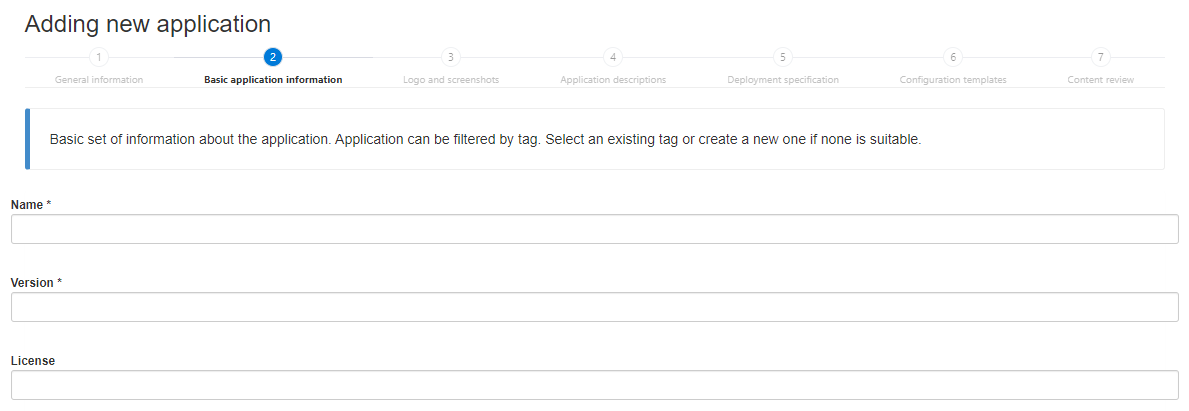
Providing Application Basic Information
The first basic information form comprises the following fields:
Name(mandatory) - name of the Application (max 30 characters)Version(mandatory) - version of the ApplicationLicense- license applied to the original Application (e.g. Apache 2.0)License URL- link to the respective license textProject website- link to the original website with additional information about the ApplicationLink to source code- link to the repository with source code of the Application (e.g. on GitHub)Link to project issues- link to the website for publishing and tracking issues related with Application (e.g. on GitHub)nmaas Documentation URL- link to a custom nmaas provider website containing additional documentation about the Application (e.g. deployment options and consideration)Select tags for application(mandatory) - selection of tags that best describe the Application from an existing list- A
dd new tags for your application- names of new (not found on the drop down selector) tags to be assigned to the Application (multiple tags can be provided, each tag needs to be confirmed withEnter)
Info
Throughout the wizard filling in some fields is mandatory and entering data in in the rest is optional. The mandatory fields are marked with a star (*) next to the field name.
In order to proceed, the user should click on the Next button.
Providing Application Logo and Screenshots
The second form allows the user to upload a Logo and a number of Screenshots or example images suitable for given Application (for presentation in the Portal).
Once Choose button is clicked a file selection window is displayed allowing the user to browse and select a file or multiple files from his local machine.

Info
Multiple graphical file formats are supported including svg, png and jpg.
In order to proceed user should click on the Next button.
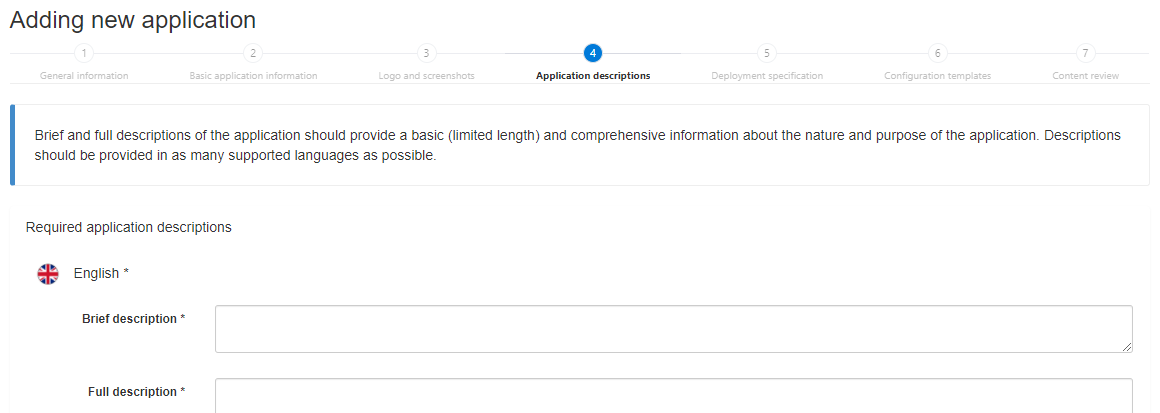
Providing Application Descriptions
Using the third form user is requested to enter two types of description of the Application to be used and displayed in different areas in the Portal:
Brief description- few words long description of the Application presented on the main Portal view with all the applications under the Application logo (max 60 characters)Full description- complete description of the Application (e.g. purpose and main features)
By default only input fields for texts in English are displayed. Dedicated fields for other languages can be displayed by checking given language on the drop down selector Select optional languages.
Info
It is mandatory to provide descriptions for the English language. Optionally appropriate texts can be provided for other supported languages
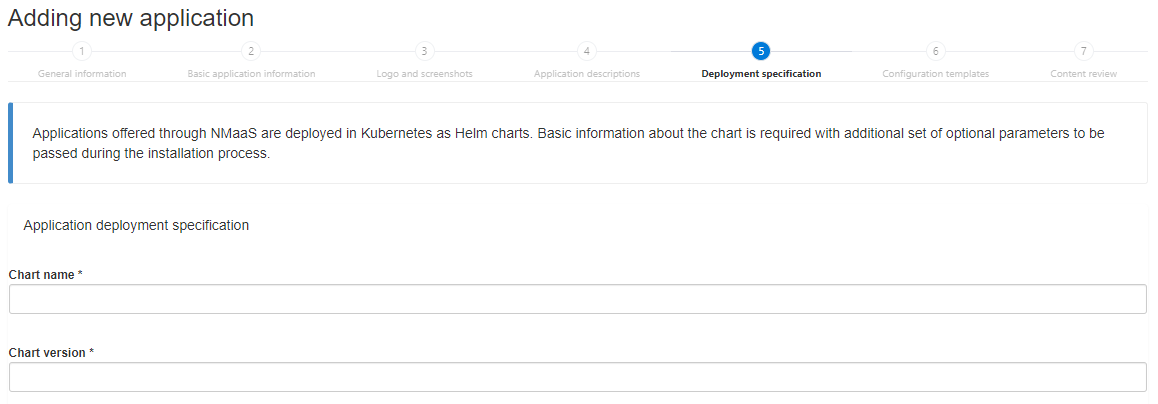
Providing Application Deployment Specification
The fourth form enables the Application manager to enter all the necessary information to allow for a fully automated deployment of new instances of particular Application.
nmaas applications are deployed using Helm thus is it mandatory to provide the respective Helm chart details and all the custom parameters to be passed as values during Helm chart installation.
General information fields
Chart name(mandatory) - name of the Helm chart (e.g.nmaas-zabbix) prefixed with the name of appropriate Helm chart repository if one different from the default is used (e.g.netbox/netbox)Chart version(mandatory) - version of the Helm chart (e.g.4.0.1)Helm Chart repository name- name of a custom repository to be added that hosts Application Helm chart (e.g.netbox)Helm Chart repository URL address- URL of the respective custom Helm chart repository (e.g.https://charts.boo.tc)Main component name- if Application installation comprises multiple deployment or statefulset objects its necessary to indicate which object should be considered as the main one (one that is used to verify if the whole Application is up and - running). An example would be server used to point to the proper deployment of the these two examplespllab-zabbix-624-serverandpllab-zabbix-624-web(this functionality assumes that names of all objects created for given Helm chart installation contain the release name string)Expose web user interface(checkbox) - if checked indicates that given Application exposes a web user interfaceAllow SSH Access(checkbox) - if checked indicates that for given Application a direct shell access to running container should be enabled
Info
In general, enabling direct user access to running containers of a given application is strongly discouraged. However, in order to allow such access and mitigate at least some of the risks, a built-in shell terminal was made available in the Portal.
Global Deploy Parameters
DOMAIN_CODENAME=zabbixServer.service.annotations."metallb\.universe\.tf/address-pool"=%VALUE%
Static Global Deploy Parameters
image.tag=7.02properties.database.password=%RANDOM_STRING_12%
Storage Volumes
Access Methods
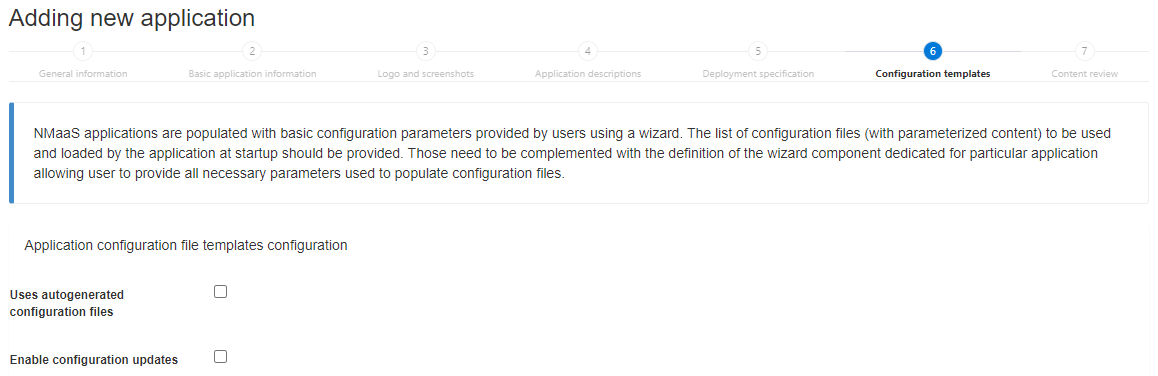
Providing Application Configuration Specification